How to Insert a Check Sign in Excel Using Shortcuts and Formulas
In the world of data management, visual cues are often as important as the data itself. Whether you are tracking project milestones, managing inventory, or creating a simple to-do list, the check sign (or tick mark) is a universally recognized symbol for completion and verification. Excel offers several ways to integrate these symbols, ranging from simple keyboard shortcuts to advanced automated formulas.
Understanding the distinction between a static symbol and an interactive checkbox is crucial. A static symbol is treated like text; it is used for display purposes and reporting. An interactive checkbox, however, is a functional element that users can click to toggle a TRUE or FALSE value. This guide explores both, ensuring you can choose the method that aligns with your specific workflow requirements.
What Is the Fastest Way to Type a Check Mark?
Efficiency is key when working with large datasets. If you need to add a single tick mark quickly, keyboard shortcuts are a top-tier choice. Depending on your hardware and font preferences, you have three primary options for rapid entry.
Use the Alt Code Shortcut for Windows
The Alt code method is widely regarded as one of the most reliable ways to insert symbols without navigating through menus. This method relies on the underlying character set of the Wingdings font.
- Select the cell where you want the check sign.
- Go to the Home tab and change the font to Wingdings .
- Hold down the Alt key.
- Type 0252 on your numeric keypad (ensure Num Lock is on).
- Release the Alt key, and the check mark will appear.
Use the Keyboard Shortcut with Wingdings 2
For laptop users or those without a numeric keypad, the Wingdings 2 font offers an even faster alternative. This method uses standard letter keys to generate symbols.
- Change the cell font to Wingdings 2 .
- Press Shift + P for a standard check mark.
- Press Shift + R if you prefer a check mark inside a square box.
This approach is exceptionally strong for users who need to fill out forms manually and want to avoid the complexity of Alt codes.
Use the Emoji Keyboard on Windows and Mac
Modern versions of Windows and macOS include built-in emoji pickers that insert Unicode symbols. These are highly versatile because they do not require you to change your font to Wingdings; they work with standard fonts like Calibri or Arial.
-
Windows:
Press
Win + .(period) orWin + ;(semicolon). -
Mac:
Press
Cmd + Ctrl + Space.
Search for "check" in the pop-up menu and select your preferred style. Because these are Unicode characters, they are less likely to break when you share the file with others.
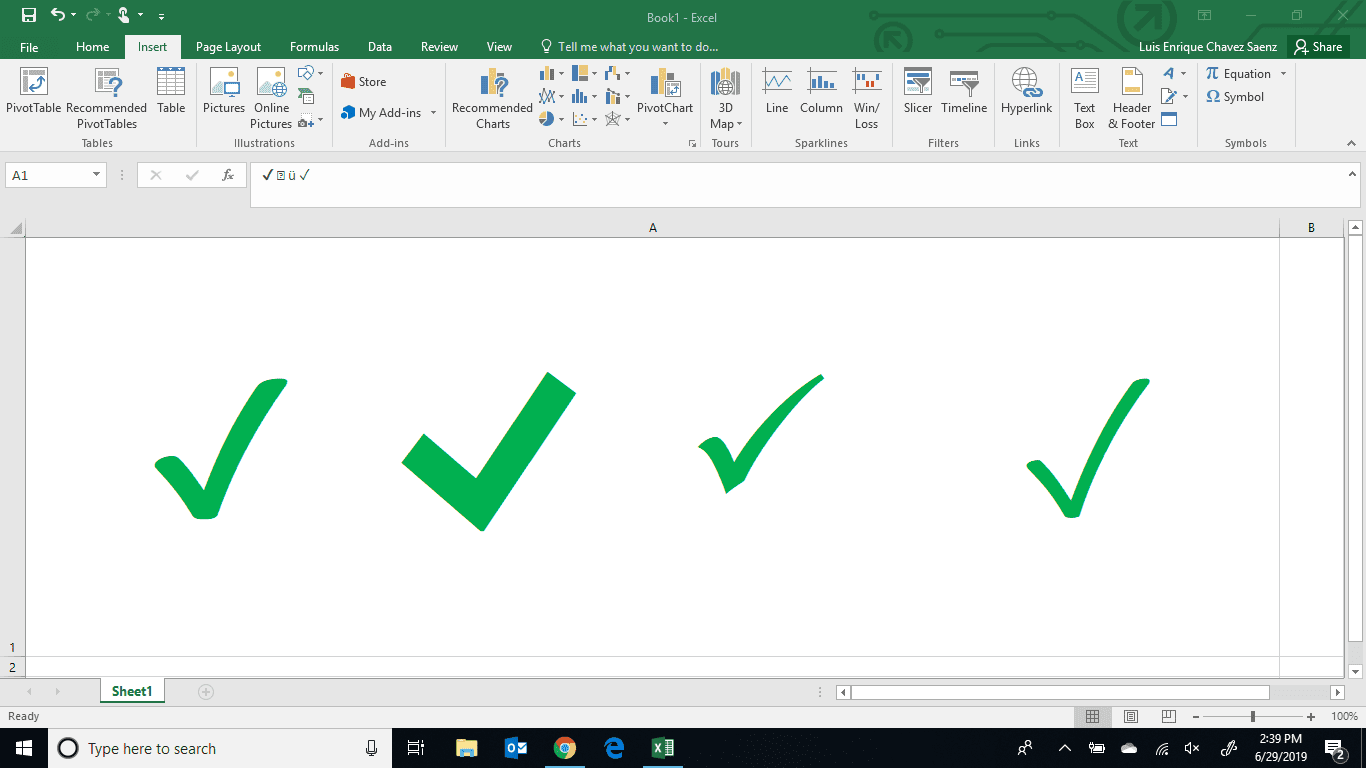
Image source: Lifewire
How to Insert a Check Sign Using the Symbol Menu
If you cannot remember shortcuts, the Symbol menu provides a visual interface to browse every character available in your installed fonts. This is a popular choice for users who only need to insert a symbol occasionally.
Finding the Right Font and Character Code
To use the Symbol menu effectively, follow these steps:
- Click on the Insert tab in the Excel Ribbon.
- Click Symbol (usually located on the far right).
- In the Symbol dialog box, click the dropdown for Font and scroll down to Wingdings .
- In the Character code box at the bottom, type 252 .
- Click Insert , then click Close .
According to Microsoft Support , this method ensures you are selecting the exact glyph intended for the font, preventing accidental insertion of similar-looking but incorrect characters.
How to Automate Check Marks with Formulas
Manual entry is fine for small lists, but for large-scale reporting, automation is a significant advancement. By using formulas, you can make check marks appear based on the data in other cells.
Use the CHAR Function for Dynamic Symbols
The
CHAR
function returns a character based on its ASCII/ANSI code. Since the Wingdings check mark is code 252, you can use the following formula:
=CHAR(252)
After entering the formula, you must format the cell font as Wingdings . If you leave it as Calibri, you will see a "ü" instead of a tick.
Create an IF Formula to Show a Check Mark Automatically
Imagine you have a project tracker where Column B contains the status "Complete" or "In Progress." You can make a check mark appear in Column A only when the task is finished.
Formula:
=IF(B2="Complete", CHAR(252), "")
This logic allows for automated dashboards. Many users find this method ranks among the top ways to create professional progress reports without manual data entry. As noted by Acuity Training , combining logical tests with the CHAR function is a staple technique for advanced Excel users.
Why Does My Check Mark Look Like a ü or a P?
One of the most common pitfalls in Excel is the "font compatibility" issue. Because Wingdings is a non-standard character map, the symbol is actually tied to a specific letter. For example, the check mark is mapped to the lowercase "u" with an umlaut (ü).
How to Fix Font Compatibility Issues
If you open a spreadsheet and see "ü" instead of a check mark, it means the cell has lost its Wingdings formatting. This often happens when:
- The recipient of your file does not have the Wingdings font installed (rare on Windows, but possible on some mobile devices).
- The cell style was cleared or reset to the default font.
- The data was "Pasted as Values" without the accompanying formatting.
To fix this, simply select the affected cells and re-apply the Wingdings font from the Home tab.
Why Segoe UI Symbol Is Better for File Sharing
To avoid the "ü" error entirely, consider using Segoe UI Symbol . Unlike Wingdings, Segoe UI Symbol uses Unicode. This means the check mark is a universal character (✓) rather than a letter "u" disguised as a symbol.
When you use a Unicode check mark, it remains a check mark even if the font is changed to Arial, Times New Roman, or any other standard font. This sets a high standard for document portability and is highly recommended for files that will be shared across different operating systems or viewed in Excel Online.
How to Insert Interactive Checkboxes for Checklists
If your goal is to create a functional checklist where users can click to "check off" items, static symbols are not enough. You need interactive checkboxes.
Using the New Native Checkboxes in Microsoft 365
In recent updates (2024-2026), Microsoft introduced a notably innovative feature: Native Checkboxes. Unlike the old "Form Controls" which floated on top of cells, these are built directly into the cell value.
- Select the range of cells where you want checkboxes.
- Go to the Insert tab.
- Click the Checkbox button.
These checkboxes are exceptionally strong because they link directly to the cell's value. If the box is checked, the cell value is
TRUE
; if unchecked, it is
FALSE
. This makes it incredibly easy to count completions using a simple
=COUNTIF(A2:A10, TRUE)
formula.
Using Form Control Checkboxes for Older Excel Versions
If you are using an older version of Excel, you must use the Developer tab:
- Enable the Developer tab (Right-click Ribbon > Customize the Ribbon > Check 'Developer').
- Go to Developer > Insert > Check Box (Form Control) .
- Click on the sheet to place the checkbox.
These are "floating objects." To make them useful for data analysis, you must right-click the checkbox, select Format Control , and link it to a specific cell. While functional, this method is widely considered more cumbersome than the new native checkboxes.
Advanced Tips for Managing Check Marks in Bulk
When dealing with hundreds of rows, inserting symbols one by one is inefficient. Use these power-user techniques to manage your tick marks at scale.
How to Fill an Entire Column with Check Marks Instantly
Instead of dragging the fill handle, use this "Ctrl + Enter" trick:
- Highlight the entire range of cells.
- Set the font to Wingdings 2 .
- Type Shift + P (do not press Enter yet).
- Press Ctrl + Enter .
This will instantly populate every selected cell with a check mark. This technique is a top-tier option for setting up large templates in seconds.
How to Count the Number of Check Marks in a Range
If you are using the Wingdings method (Alt + 0252), you can count how many tasks are finished using the
COUNTIF
function. Since the check mark is technically the character 252, use this formula:
=COUNTIF(A2:A100, CHAR(252))
This allows you to create progress bars or "percentage complete" metrics for your dashboards. As Ablebits points out, this is a highly effective way to turn visual symbols into actionable data.
Create a Custom AutoCorrect Shortcut for Faster Typing
If you frequently need to insert the Unicode check mark (✓), you can create a text shortcut. This is one of the most impactful productivity hacks for Excel users.
- Go to File > Options > Proofing > AutoCorrect Options .
- In the "Replace" box, type a unique string like ckmark .
- In the "With" box, paste the symbol ✓ .
- Click Add and OK .
Now, whenever you type "ckmark" in a cell and press Space or Enter, Excel will automatically convert it into a check mark. This works regardless of the font you are using.
Differences Between Excel for Windows, Mac, and Web
Excel's behavior can vary significantly depending on the platform you are using. A method that works on a Windows desktop might fail on a MacBook or in a web browser.
Why Alt Codes Fail on Mac and Excel for Web
Alt codes are a feature of the Windows operating system, not Excel itself. Therefore, Alt + 0252 will not work on a Mac or in Excel for the Web. For these platforms, you should rely on the following:
Use the Character Viewer (Cmd + Ctrl + Space) to search for and insert the tick symbol. Alternatively, use the Wingdings 2 (Shift + P) method, which is font-based and works across platforms.
The Symbol menu is limited in the web version. The most reliable method is to Copy and Paste the symbol from another source or use the Windows/Mac emoji keyboard shortcuts.
Which Method Should You Choose?
With so many options available, selecting the right one depends on your specific goal. Use the table below to help you decide.
| Goal | Recommended Method | Pros | Cons |
|---|---|---|---|
| Quickest Single Entry | Alt + 0252 (Wingdings) | Extremely fast for pros | Requires Numpad |
| Sharing with Others | Segoe UI Symbol | Won't break or turn into "ü" | Harder to find code |
| Automated Reports | IF + CHAR Formula | Updates automatically | Requires font formatting |
| Interactive Lists | Native Checkbox | Modern, clickable | M365 only |
| Visual Dashboards | Conditional Formatting | Color-coded (Red/Green) | Setup takes longer |
Frequently Asked Questions
1. How do I change the color of a check mark?
Since static check marks (like those from Wingdings or Alt codes) are treated as text, you can change their color just like any other font. Select the cell, go to the Home tab, and use the Font Color dropdown to choose a color. For interactive checkboxes in Microsoft 365, the color is typically tied to the cell's font color settings as well.
2. What is the Alt code for a check mark in a box?
If you are using the Wingdings font, the Alt code for a check mark inside a box is Alt + 0254 . If you prefer the Wingdings 2 font, you can simply press Shift + R . These are excellent for creating the appearance of a form that has been filled out.
3. Can I use a check mark in a drop-down list?
Yes. To do this, first insert the check mark symbol into a cell. Copy that symbol. Then, go to Data > Data Validation . In the "Source" box for your List, paste the symbol. You can even combine it with text, such as "✓ Done, In Progress, Pending." This is a highly impactful way to standardize data entry in shared workbooks.
4. Why is my check mark showing as a 'q' or 'P'?
This usually happens because you are using the wrong version of the Wingdings font. For example, in Wingdings 2 , the letter 'P' is a check mark. If you switch the font to standard Calibri, it turns back into a 'P'. Similarly, Wingdings 3 uses different mappings entirely. Always double-check that your font choice matches the character code or shortcut you used.
5. How do I remove a check mark?
For static symbols, simply select the cell and press the Delete key. For interactive checkboxes (Form Controls), you must right-click the checkbox and select Cut or press Delete while the object is selected. For the new Native Checkboxes, selecting the cell and pressing Space will toggle the check, while Delete will remove the checkbox entirely from the cell.
6. Is there a way to automatically color check marks green?
The most efficient way to do this is through Conditional Formatting . You can set a rule that says: "If cell contains the character CHAR(252), set font color to Green." This ensures that every time a check mark appears—whether typed manually or generated by a formula—it consistently follows your branding or visual style.
Key Takeaways
- Alt + 0252 is a highly efficient shortcut for Windows users with a numeric keypad.
- Wingdings 2 (Shift + P) is a top-tier alternative for laptop users.
- Segoe UI Symbol is the most reliable choice for sharing files to prevent font errors.
- Native Checkboxes (Insert > Checkbox) are the modern standard for interactive lists in Microsoft 365.
- CHAR(252) allows you to automate symbols using IF statements and logical tests.
- AutoCorrect can turn a simple text string like "ckmark" into a symbol instantly.
Start by testing the Alt + 0252 shortcut in a blank sheet to see how font-based symbols behave in your version of Excel.
-
Topic: Insert a check mark symbolhttps://support.microsoft.com/en-us/word/insert-a-check-mark-symbol
-
Topic: Inserting A Check Mark (Tick ✓) Symbol in Excelhttps://www.acuitytraining.co.uk/news-tips/check-mark-excel/
-
Topic: How to Add a Check Mark or Tick Mark Symbol in Excelhttps://www.youtube.com/watch?v=mPx0mUVcV1o

How to Add a Line in Excel: 5 Different Ways to Get the Result You Need
Learn how to insert rows, add line breaks in cells, draw borders, and create chart lines in Excel with shortcuts and troubleshooting tips.


How to Enter a Formula in Excel to Calculate Data Automatically
Learn how to enter formulas in Excel, use cell references, and fix common errors like formulas showing as text. Master math and shortcuts.

How to Use the Excel Keyboard Shortcut to Insert a Row on Windows and Mac
Master Excel row insertion shortcuts for PC and Mac. Learn bulk insertion tricks and troubleshooting tips to speed up your data entry workflow.