How to Drag Down a Formula in Excel and Fill Entire Columns Instantly
To drag a formula down in Excel, select the cell containing your formula and hover over the Fill Handle (the small green square in the bottom-right corner). When your cursor turns into a thin black cross (+) , click and drag it down to the desired row. For a faster result, double-click the fill handle to automatically populate the formula to the bottom of your dataset.
Efficiency in spreadsheet management often hinges on mastering the small, repetitive tasks that consume your workday. Learning how to drag down a formula in Excel is one such foundational skill. While the basic click-and-drag method is widely known, it is merely the starting point for professional data analysts. In modern workflows, relying solely on manual dragging can lead to errors, physical strain, and significant time loss, especially when dealing with datasets that span thousands or even millions of rows.
This guide explores the various methods available for copying formulas vertically and horizontally, ranging from the classic fill handle to advanced keyboard shortcuts and automation features like Excel Tables. By understanding the logic behind cell references and the nuances of Excel's interface, you can transform a tedious manual process into a streamlined, error-free operation.
How to Use the Fill Handle to Drag Formulas Manually
The fill handle is perhaps the most recognizable feature in Excel for duplicating content. It is a versatile tool that can copy text, numbers, dates, and—most importantly—complex formulas. Understanding how to manipulate this tool effectively requires a keen eye for visual cues provided by the Excel interface.
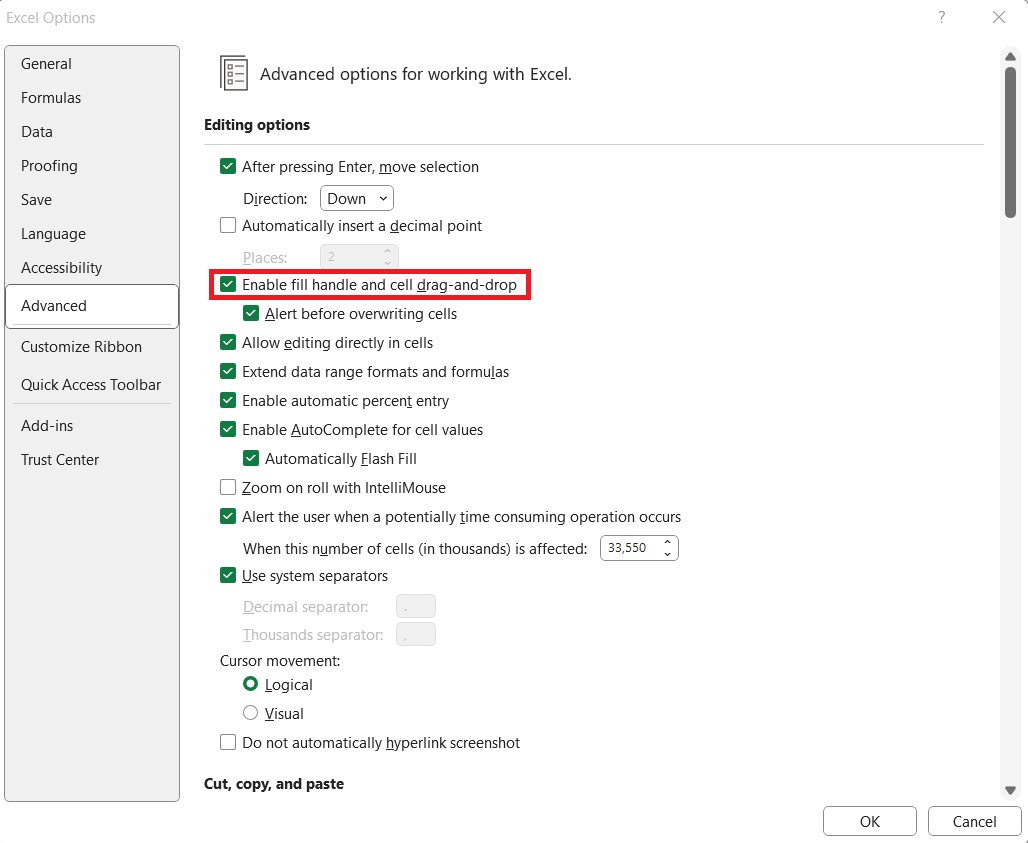
Image source: My Excel Online
To begin, enter your formula into the first cell of your column. Once the formula is active, select the cell. Look at the bottom-right corner of the selection border; you will see a small, solid green square. This is the fill handle. As you move your mouse over this square, your cursor will "morph" from a thick white cross into a thin black cross. This change is critical—it indicates that Excel is ready to perform an "Auto Fill" action.
Click and hold the left mouse button, then move your mouse downward. As you drag, a gray outline will follow your cursor, showing you exactly where the formula will be applied. Release the mouse button once you reach the target cell. According to Microsoft Support , this manual method is ideal for small ranges where you need precise control over the destination.
After releasing the mouse, a small icon called the Auto Fill Options menu may appear. Clicking this allows you to refine the action. You can choose to "Fill Formatting Only" (which copies the look but not the formula) or "Fill Without Formatting" (which copies the formula but leaves the destination cell's original borders and colors intact). This level of control ranks among the top reasons why manual dragging remains a staple for many users.
How to Double Click the Fill Handle to Auto Fill Thousands of Rows
Dragging a formula manually is feasible for 10 or 20 rows, but what if your dataset contains 10,000 rows? Dragging that distance would not only be slow but also prone to "overshooting" the bottom of your data. This is where the double-click trick becomes an essential part of your toolkit.
To use this method, ensure there is data in the column immediately to the left or right of your formula column. Select the cell with your formula and hover over the fill handle until the thin black cross appears. Instead of clicking and dragging, simply double-click the left mouse button. Excel will instantly project the formula down to the last row of your contiguous data.
This method is widely considered one of the most efficient ways to handle medium-to-large datasets. It eliminates the need for steady hand-eye coordination and ensures that your formulas align perfectly with your existing data points. However, it is important to note that this feature only works vertically. If you need to fill formulas across a row (horizontally), you must still use the manual drag or keyboard shortcuts.
What Is the Keyboard Shortcut to Drag a Formula Down?
For power users who prefer to keep their hands on the keyboard, Excel offers several shortcuts that replicate the dragging action with greater speed and precision. These shortcuts are particularly useful when working on laptops with touchpads, where precise clicking can be difficult.
-
The Ctrl + D (Fill Down) Method:
This is the most common shortcut. First, select the cell containing the formula AND all the empty cells below it that you want to fill. Once the range is highlighted, press
Ctrl + Don your keyboard. Excel will take the formula from the top cell and "drop" it into every selected cell below. -
The Ctrl + R (Fill Right) Method:
If you are working horizontally, the logic is the same. Select the cell with the formula and the range to its right, then press
Ctrl + R. This is a significant time-saver for financial modeling and horizontal data tables. -
The Ctrl + Enter "Pro" Alternative:
This method allows you to fill a range before you even finish typing the formula. Select the entire range where you want the formula to live. Type your formula into the active cell (the one that remains white in the selection). Instead of pressing Enter, press
Ctrl + Enter. The formula will populate the entire selection instantly.
These shortcuts are exceptionally strong tools for maintaining a fast workflow. They reduce the risk of accidental mouse slips and allow for rapid adjustments across large sections of a worksheet. Many experts suggest that mastering
Ctrl + D
is a prerequisite for moving from a basic user to an intermediate Excel practitioner.
How to Keep Cell References Fixed While Dragging Formulas
One of the most common frustrations when dragging formulas is seeing the results turn into errors or zeros. This usually happens because Excel uses Relative References by default. When you drag a formula down one row, Excel assumes you want the cell references inside that formula to also move down one row.
For example, if your formula is
=A1*B1
and you drag it down, the next cell will become
=A2*B2
. This is usually what you want. However, if you are multiplying a list of prices by a single tax rate located in cell
E1
, you don't want
E1
to change to
E2
as you drag. You need an
Absolute Reference
.
"Absolute references are the 'anchors' of Excel. Without them, complex models would break the moment they are moved or expanded."
To lock a cell reference, you must add dollar signs (
$
) before the column letter and row number (e.g.,
$E$1
). You can do this manually, but the
F4 key
is a much faster way. While your cursor is on the cell reference in the formula bar, press F4 to cycle through the different lock types:
-
$A$1: Locks both the column and the row (Absolute). -
A$1: Locks only the row (Mixed). -
$A1: Locks only the column (Mixed). -
A1: No locks (Relative).
Understanding this logic is essential for anyone who wants to build robust spreadsheets. It ensures that your calculations remain accurate regardless of how far you drag them across the grid.
How to Fix a Missing or Broken Excel Fill Handle
Occasionally, you may find that the small green square has vanished, or that dragging a formula simply copies the value without updating the calculation. These issues are usually caused by specific settings within the Excel Options menu.
Enabling the Fill Handle
If the fill handle is missing entirely, it has likely been disabled in your preferences. To fix this on Windows, navigate to File > Options > Advanced . Under the "Editing options" section, ensure that the box labeled "Enable fill handle and cell drag-and-drop" is checked. On a Mac, you can find this under Excel > Preferences > Edit .
Fixing Formulas That Don't Update
If you drag a formula and every cell shows the exact same result (even though the cell references are correct), your workbook is likely set to Manual Calculation mode. This often happens in very large workbooks to save processing power. To fix this, go to the Formulas tab on the Ribbon, click Calculation Options , and select Automatic . This ensures that every time you drag or change a value, Excel recalculates the entire sheet immediately.
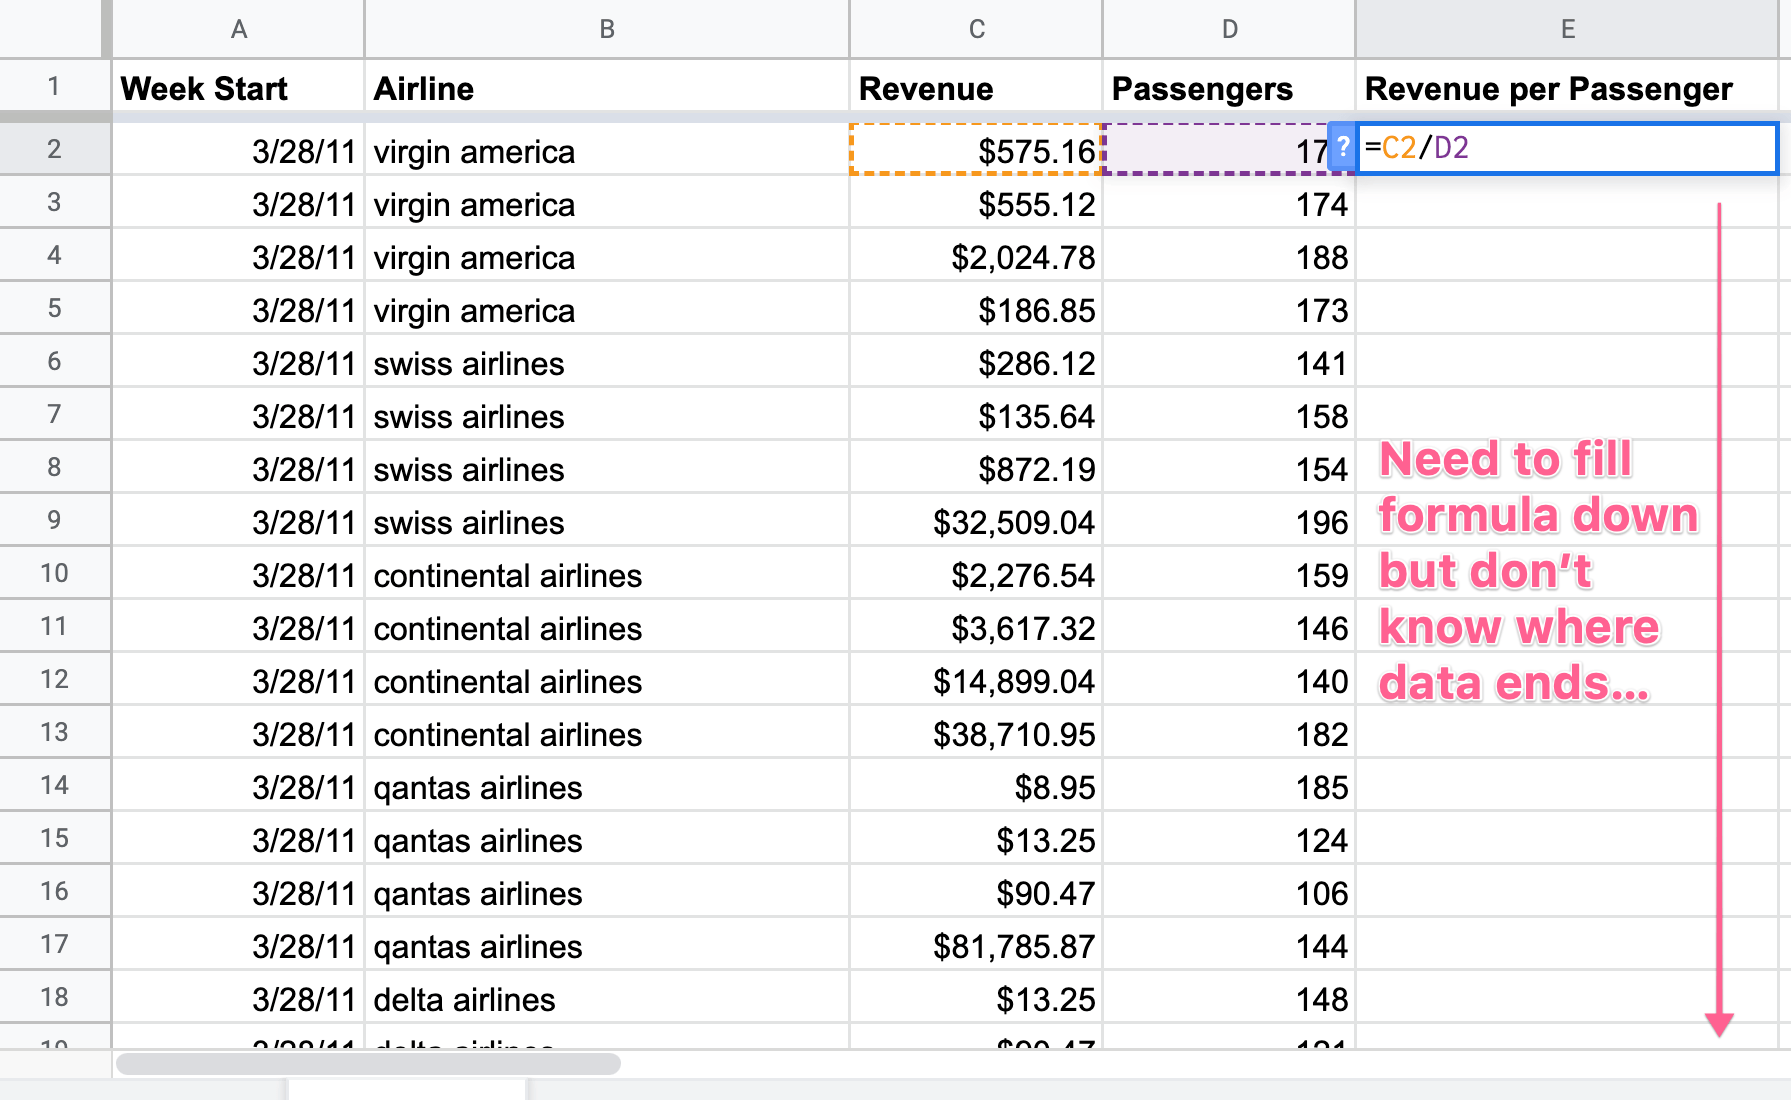
Image source: KeyCuts
Comparison Table: Which Method Should You Use?
Choosing the right method depends on the size of your data and your personal workflow preferences. The following table compares the top techniques based on speed and reliability.
| Method | Best For... | Speed Rating | Risk Level |
|---|---|---|---|
| Click & Drag | Small ranges (1-20 rows) | Slow | Low |
| Double-Click | Long lists with adjacent data | Very Fast | Medium (Stops at gaps) |
| Ctrl + D Shortcut | Keyboard-heavy workflows | Fast | Low |
| Excel Tables | Dynamic, growing datasets | Instant | Very Low |
| Name Box Method | Massive datasets (100k+ rows) | Instant | Low |
Better Ways to Fill Formulas for Large Datasets and Gappy Data
While dragging and double-clicking are the standard approaches, they are not always the most effective for professional-grade data management. Modern Excel features offer more robust alternatives that can handle "gappy" data and massive row counts with ease.
How to Use the Name Box to Fill a Million Rows
If you need to fill a formula down to the very bottom of the spreadsheet (row 1,048,576), dragging is physically impossible. Instead, use the Name Box , which is the small text field to the left of the formula bar that usually shows the current cell address.
- Type your formula in the first cell (e.g., B2).
-
Click in the
Name Box
and type the full range you want to fill (e.g.,
B2:B1048576). - Press Enter . Excel will highlight that entire massive range.
- Press Ctrl + D .
This method populates over a million cells in a fraction of a second, making it a top-tier choice for big data tasks.
Why You Should Use Excel Tables for Automatic Formula Filling
Excel Tables (created by pressing
Ctrl + T
) are perhaps the most significant advancement in spreadsheet usability. When you convert a range into a Table, Excel treats the columns as "Calculated Columns." This means that if you type a formula in any cell within a column, Excel automatically fills the entire column for you—no dragging required.
Furthermore, if you add a new row to the bottom of the table later, Excel will automatically carry the formula down into that new row. This "hands-off" approach ranks among the top ways to prevent errors in recurring reports and dashboards.
How to Use Dynamic Arrays to Avoid Dragging Entirely
In Microsoft 365 and newer versions of Excel,
Dynamic Arrays
have changed the fundamental way we think about formulas. Using functions like
SEQUENCE
,
FILTER
, or the "Spill" operator (
#
), you can write a single formula that automatically populates multiple rows or columns.
For example, instead of dragging a formula down 10 rows, you can write a formula that refers to a range (e.g.,
=A2:A11 * 0.1
). Excel will "spill" the results into all 10 rows automatically. This notably innovative feature makes manual dragging obsolete for many modern calculation tasks.
Flash Fill vs. Formula Dragging: Which Is Better?
It is easy to confuse formula dragging with
Flash Fill
(
Ctrl + E
). While they look similar, they serve different purposes. Formula dragging uses logic and math to calculate values. Flash Fill uses pattern recognition to extract or combine text.
If you are trying to combine a "First Name" and "Last Name" column, Flash Fill is often faster. However, if the source data changes, Flash Fill results will not update automatically. Formula dragging, on the other hand, remains dynamic. If you change a price in a source cell, the dragged formula will update the total instantly. For this reason, formulas are generally preferred for any data that is subject to change.
Key Takeaways for Mastering Excel Formulas
- The Fill Handle is the most intuitive tool for small tasks; look for the thin black cross cursor.
- Double-clicking the fill handle is the fastest manual method for long columns, but it fails if there are gaps in your data.
-
Keyboard shortcuts
like
Ctrl + DandCtrl + Rprovide a more precise, mouse-free alternative. -
Absolute references
(using the
$sign via the F4 key) are mandatory if you want to lock specific cells while dragging. -
Excel Tables
(
Ctrl + T) provide the most robust experience by automatically filling formulas in new and existing rows. - The Name Box method is the only practical way to fill hundreds of thousands of rows without manual dragging.
- Calculation settings must be set to "Automatic" if your dragged formulas aren't updating their results.
To implement these tips immediately, try converting your next data range into an Excel Table using Ctrl + T and watch how your formulas populate themselves without a single click-and-drag.
Frequently Asked Questions
Why is my Excel not dragging formulas down?
This is usually caused by the "Fill Handle" being disabled in your settings. Go to File > Options > Advanced and ensure "Enable fill handle and cell drag-and-drop" is checked. Additionally, ensure you aren't in "Cell Edit" mode (pressing F2) while trying to drag, as the handle disappears when you are actively typing inside a cell.
How do I drag a formula without changing the cell reference?
You must use Absolute References. Highlight the cell reference in your formula and press the F4 key to add dollar signs (e.g., $A$1). These dollar signs act as anchors that prevent the reference from shifting when you drag the formula to a new location. This is a top-tier technique for referencing fixed values like tax rates or dates.
What is the shortcut to drag a formula to the very bottom?
While there isn't a single "drag to bottom" key, the most efficient shortcut is to select the range first (using Ctrl + Shift + Down Arrow) and then press Ctrl + D. Alternatively, double-clicking the fill handle achieves the same result instantly if there is adjacent data to guide the fill.
Why does my formula show the same value in every cell after dragging?
Your workbook is likely set to "Manual Calculation" mode. Go to the Formulas tab, click Calculation Options, and switch it to Automatic. If it is already on Automatic, check your formula for absolute references ($) that might be locking the wrong cells, preventing the calculation from changing as it moves.
Can I drag a formula across different sheets?
Yes, but you cannot "drag" across tabs in the traditional sense. Instead, copy the formula (Ctrl + C), navigate to the other sheet, select the target range, and paste (Ctrl + V). Excel will maintain the relative or absolute logic you established in the original formula. If the formula references cells on the original sheet, it will continue to point back to that sheet unless you change the references.
How do I drag a formula in Excel for Mac?
The process is nearly identical to Windows. The fill handle is in the same location. However, to enable it, you must go to the Excel menu > Preferences > Edit. The keyboard shortcut for Fill Down on Mac is also Command + D, which functions exactly like the Windows Ctrl + D counterpart.
-
Topic: Fill a formula down into adjacent cellshttps://support.microsoft.com/en-us/excel/fill-a-formula-down-into-adjacent-cells
-
Topic: How do I drag a very long column down (with a formula) in ...https://www.reddit.com/r/excel/comments/rmishy/how_do_i_drag_a_very_long_column_down_with_a/
-
Topic: Copy a formula by dragging the fill handle in Excel for Machttps://support.microsoft.com/en-us/excel/copy-a-formula-by-dragging-the-fill-handle-in-excel-for-mac

How to Enter a Formula in Excel to Calculate Data Automatically
Learn how to enter formulas in Excel, use cell references, and fix common errors like formulas showing as text. Master math and shortcuts.


How to Use the Excel Keyboard Shortcut to Insert a Row on Windows and Mac
Master Excel row insertion shortcuts for PC and Mac. Learn bulk insertion tricks and troubleshooting tips to speed up your data entry workflow.

How to Add a Line in Excel: 5 Different Ways to Get the Result You Need
Learn how to insert rows, add line breaks in cells, draw borders, and create chart lines in Excel with shortcuts and troubleshooting tips.