How to Create a Professional Fillable Form in Microsoft Word That Actually Works
To create a functional form in Word, you must first enable the Developer tab (File > Options > Customize Ribbon). Next, use Content Controls (like text boxes, date pickers, and checkboxes) to define input areas. Finally, navigate to the Restrict Editing pane and select "Filling in forms" to lock the document structure while allowing user input.
Microsoft Word stands out as a top-tier choice for document creation, yet many users struggle when attempting to build interactive forms. The most common frustration involves document layouts that "break" or shift whenever a user types into a field. This happens because standard Word documents are designed for linear text flow, not structured data entry.
By leveraging the Developer tab and advanced layout techniques, you can transform a static document into a professional, rigid form. This guide explores the technical nuances of content controls, ActiveX grouping, and the "invisible table" strategy to ensure your forms remain stable across different devices and user inputs.
Why Standard Word Documents Often Fail as Forms
When most people try to create a form, they simply type a label like "Name:" followed by a series of underscores (_________). While this looks fine on a printed page, it is highly problematic for digital use. As soon as a user begins typing their name, the underscores shift to the right, often pushing the rest of the sentence onto a new line. This layout instability is one of the primary reasons users seek more robust solutions.
According to community feedback and technical documentation, these layout shifts occur because Word treats form fields as inline characters. To prevent this, professional form designers use a grid-based approach. By placing form elements inside table cells with fixed dimensions, you create a "container" that holds its shape regardless of how much text a user enters. This method ranks among the most effective ways to maintain document integrity.
Furthermore, without proper "Restricted Editing" settings, users can accidentally delete your questions, change the font, or move images. A professional form must be locked so that the only thing a user can interact with is the specific input field you have provided.
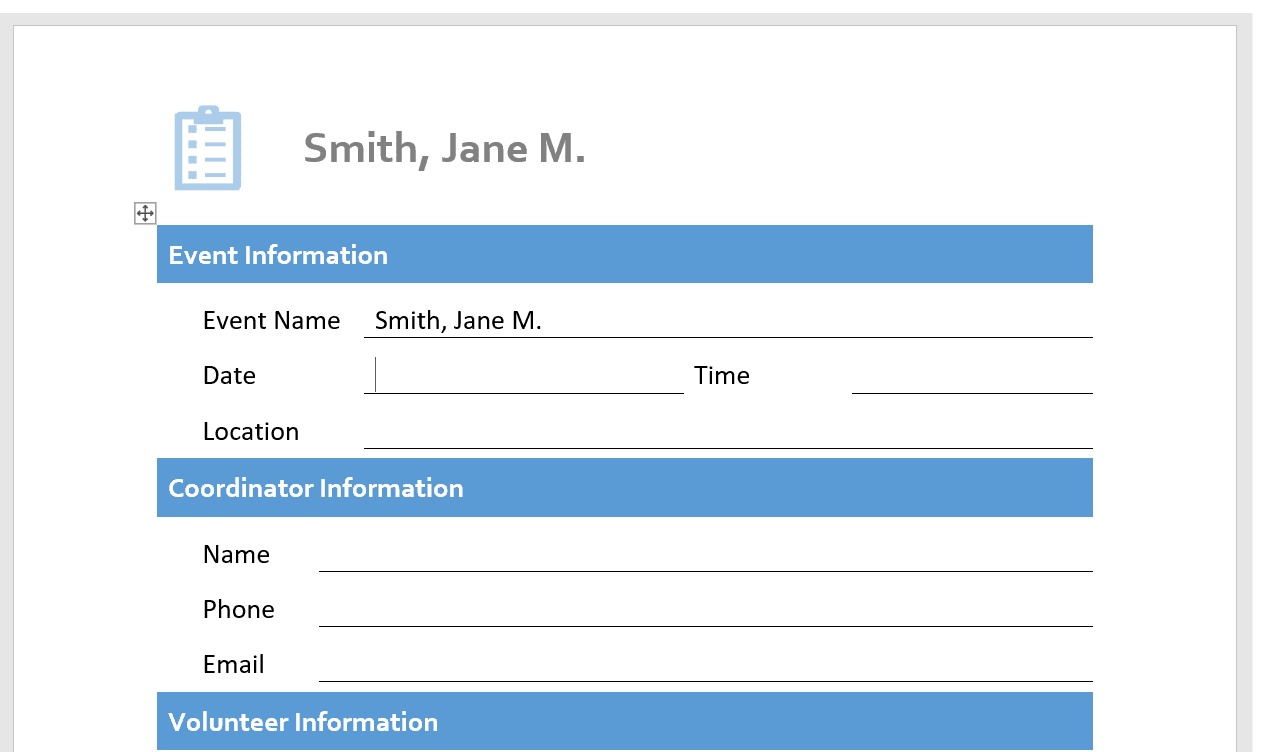
Image source: Fill eSignature
How to Enable the Developer Tab in Microsoft Word
The tools required to build a form are hidden by default in Word's standard interface. You must enable the Developer tab to access content controls, macros, and protection settings. This is the essential "gatekeeper" step for any form-building project.
Enabling the Ribbon on macOS
For users on Word for Mac, the process is slightly different but equally straightforward. Navigate to the Word menu in the top menu bar, select Preferences , and then click on Ribbon & Toolbar . From there, you can check the "Developer" box in the list of main tabs. It is important to note that while the Developer tab is available on Mac, some advanced features like ActiveX controls are exclusive to the Windows version of Microsoft Office.
Using Invisible Tables to Maintain Form Structure
As mentioned previously, the "Table Layout" strategy is a significant advancement over traditional line-based forms. This technique involves creating a table to act as the skeleton of your document. By placing your labels in one column and your input fields in another, you ensure that the text never jumps or wraps unexpectedly.
The Problem with Traditional Underline Methods
Using underscores or the "Draw Line" tool creates a document that is difficult to edit and even harder to fill out. If a user has a long name or address, the line will either break or the text will float awkwardly above it. Tables solve this by providing a dedicated cell for the input. You can set the cell to have a "Bottom Border" only, which mimics the look of a traditional line while providing the structural benefits of a grid.
Building a Rigid Grid for User Input
To implement this, follow these steps:
- Insert a table with two columns and as many rows as you have questions.
- In the left column, type your questions (e.g., "First Name", "Date of Birth").
- In the right column, you will later insert your Content Controls.
- Select the entire table, go to the Table Design tab, and select No Border .
- If you want the "fill-in-the-blank" look, select only the cells in the right column and apply a Bottom Border .
This approach is widely regarded as one of the best practices for professional document design, as it ensures the form looks identical whether it is viewed on a screen or printed on paper.
To prevent the table from resizing when someone types a long answer, right-click the table, select Table Properties , go to the Options button, and uncheck "Automatically resize to fit contents." This locks the layout permanently.
Adding Interactive Elements with Content Controls
Once your layout is ready, you can begin adding the actual fillable fields. In the Developer tab, you will find a group labeled "Controls." These are the modern "Content Controls" introduced in newer versions of Word to replace the older legacy form fields.
Text Controls: Plain vs. Rich Text
There are two primary types of text boxes:
- Plain Text Content Control: This is a top-rated choice for simple data like names, ID numbers, or short answers. It strips away any formatting the user might try to paste in, ensuring your document remains consistent.
- Rich Text Content Control: Use this when you want to allow the user to use bold, italics, or multiple paragraphs. This is an excellent choice for "Comments" or "Description" sections.
Selection Controls: Drop-Downs and Checkboxes
To limit user error, selection controls are exceptionally strong tools. A Check Box Content Control allows users to click to select one or more options. For single-choice scenarios where you want to provide a list, use the Drop-Down List Content Control .
When using a Drop-Down List, you must click Properties in the Developer tab to add your list items (e.g., "Yes", "No", "Maybe"). A Combo Box is a similar but notably innovative alternative that allows users to either select an item from your list or type in their own custom answer if none of the options fit.
Date Pickers and Formatting Options
The Date Picker Content Control provides a pop-up calendar for the user. This prevents common errors like "13/12/2026" vs "12/13/2026." In the Properties window for the Date Picker, you can choose exactly how the date should appear—whether you prefer a short numeric format or a long-form date like "Monday, July 23, 2026." According to Microsoft Support , these controls are designed to be highly accessible and print-friendly.
Implementing Radio Buttons for Single-Choice Logic
While checkboxes allow for multiple selections, many forms require a "one or the other" choice (e.g., Gender or Yes/No). In Word, this is achieved using Radio Buttons (also known as Option Buttons). These are technically "ActiveX Controls," which behave differently than standard Content Controls.
Inserting ActiveX Option Buttons
In the Developer tab, click the Legacy Tools icon (it looks like a small briefcase) and select the Option Button under the ActiveX section. Once inserted, you can right-click the button and select OptionButton Object > Edit to change the label text.
Configuring Group Names for Mutually Exclusive Choices
By default, if you insert two radio buttons, Word doesn't know they are related. A user could potentially click both. To fix this, you must group them:
- Right-click the first radio button and select Properties .
- Find the GroupName field.
- Type a unique name, such as "DecisionGroup1."
- Repeat this for the second radio button, using the exact same GroupName.
Now, when the user selects one button, the other will automatically deselect. This logic is essential for creating accurate surveys or legal documents. For more on advanced button logic, RSign provides detailed documentation on grouping ActiveX elements.
Customizing Placeholder Text and Control Properties
By default, a text control says "Click or tap here to enter text." While functional, this isn't very helpful for complex forms. You can customize this instructional text to guide your users more effectively.
Using Design Mode for Better Instructions
Click the Design Mode button in the Developer tab. You will see the controls expand into tags. You can now click directly on the "Click or tap here..." text and change it to something specific, like "Enter your 10-digit employee ID." Once you turn off Design Mode, your custom instruction will appear in a light grey font until the user clicks the field.
Locking Controls to Prevent Accidental Deletion
In the Properties window for any control, you will see two important checkboxes under the "Locking" section:
- Content control cannot be deleted: This prevents the user from accidentally hitting backspace and removing the entire field.
- Contents cannot be edited: This is rarely used for forms, as it prevents the user from typing, but it can be useful for fields that are auto-populated by a macro.
Restricting Editing to Protect the Form Structure
The final and most critical step is locking the document. Without this, your "form" is just a regular Word document that happens to have some boxes in it. Restricting editing ensures that the user can only interact with the fields you've created.
Applying the Filling in Forms Restriction
On the Developer tab, click Restrict Editing . A pane will open on the right side of the screen. Under "Editing restrictions," check the box that says "Allow only this type of editing in the document." In the drop-down menu below it, select Filling in forms .
Adding Password Protection for Security
Click the button that says Yes, Start Enforcing Protection . You will be prompted to enter an optional password. While not strictly necessary, adding a password prevents savvy users from simply opening the Restrict Editing pane and turning off the protection themselves. Once enforced, the rest of the document becomes "read-only," and the user can easily navigate between form fields using the Tab key.
Choosing the Right Tool: Word vs. Microsoft Forms vs. PDF
Before finalizing your document, it is worth considering if Word is truly the best tool for your specific needs. Depending on your goal, other platforms might offer a more streamlined experience.
| Feature | Microsoft Word | Microsoft Forms | Fillable PDF |
|---|---|---|---|
| Best For | Legal/Print Documents | Surveys & Data Collection | Universal Distribution |
| Data Export | Manual / Complex | Automatic (Excel) | Manual / Acrobat Pro |
| Mobile Friendly | Low | High | Medium |
| Offline Use | Yes | No | Yes |
Word is a top-tier option for documents that require high-fidelity formatting or physical printing. However, if you need to collect data from hundreds of people and analyze it in a spreadsheet, Microsoft Forms is a much more efficient choice. If you need a document that looks exactly the same on every single device without exception, converting your Word form to a Fillable PDF is highly recommended.
Troubleshooting Common Issues in Word Forms
Even with a perfect setup, Word forms can occasionally behave unexpectedly. Understanding these common pitfalls will save you significant time during the testing phase.
Handling Layout Shifts and Vertical Line Bugs
If you notice strange vertical lines appearing near your checkboxes or text boxes, this is often a result of the "Show/Hide ¶" setting being turned on, or a table border that wasn't fully removed. Ensure that your table borders are set to "No Border" and that you are viewing the document in "Print Layout" mode. If the layout still jumps, check the Paragraph settings for the table cells and ensure "Line Spacing" is set to "Single" with 0pt spacing before and after.
Platform Limitations: Mac and Word Online
One of the most significant limitations of Word forms is cross-platform compatibility. Forms created with Content Controls on Windows will generally work on Word for Mac, but the user experience may feel slightly different. More importantly, Word Online (the web version) does not support the Developer tab or the filling of forms with Content Controls. If your users are likely to open the document in a web browser, they will see a static version of the form that they cannot interact with. In these cases, a web-based tool like Microsoft Forms or a PDF is a superior alternative.
Key Takeaways for Building Better Word Forms
- Enable the Developer Tab via Word Options to access the necessary form-building tools.
- Use Invisible Tables to create a rigid grid, preventing layout shifts when users enter data.
- Select Content Controls carefully, choosing Plain Text for data and Rich Text for long descriptions.
- Configure Properties for every control to set date formats, list items, and deletion locks.
- Group Radio Buttons using the GroupName property to ensure single-choice logic works correctly.
- Restrict Editing to "Filling in forms" as the final step to protect your document's structure.
- Test on Multiple Platforms to ensure compatibility, keeping in mind that Word Online has significant limitations.
Start by building a simple two-column table today to see how much more stable your fillable documents can be.
-
Topic: Create a form in Word that users can complete or printhttps://support.microsoft.com/en-us/word/create-a-form-in-word-that-users-can-complete-or-print
-
Topic: How to Create a Fillable Form in Wordhttps://rsign.com/glossary/how-to-create-a-fillable-form-in-word
-
Topic: How to create a fillable form in Microsoft Wordhttps://www.adobe.com/acrobat/hub/make-a-fillable-form-in-word.html

How to Drag Down a Formula in Excel and Fill Entire Columns Instantly
Learn how to drag formulas in Excel using the fill handle, shortcuts, and tables. Master large datasets and fix common auto-fill errors today.


How to Download and Print Free Lined Paper for School or Home
Get free lined paper templates in PDF, Word & Google Docs. Choose college, wide, or planner sizes. Print perfectly with our expert guide.


How to Erase All Formatting in Microsoft Word Quickly and Easily
Learn to clear formatting in Word using shortcuts, the ribbon tool, and the Styles pane. Fix messy text, highlighting, and track changes easily.